

Installing an NH fuse in a fuse holder is a crucial process that ensures the safety and proper functioning of electrical systems. As a trusted NH fuse supplier, I understand the importance of providing clear and detailed guidance on this topic. In this blog post, I will walk you through the step-by-step process of installing an NH fuse in a fuse holder, highlighting key considerations and safety precautions along the way.
Understanding NH Fuses
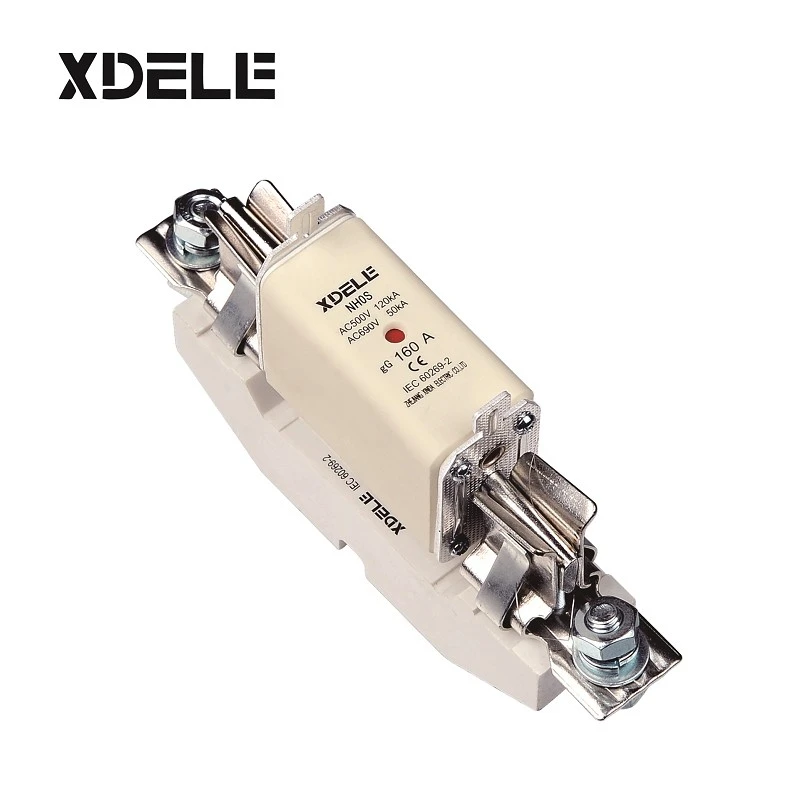
Before we delve into the installation process, it's essential to have a basic understanding of NH fuses. NH fuses, also known as high-breaking-capacity fuses, are designed to protect electrical circuits from overcurrent conditions. They are commonly used in industrial and commercial applications due to their high interrupting ratings and reliability. NH fuses come in various sizes and ratings, including NT/NH1 Fuse Link, NH0 with Indicator Fuse Link, and NT/NH00 Fuse Link, each tailored to specific electrical requirements.
Tools and Materials Required
To install an NH fuse in a fuse holder, you will need the following tools and materials:
- NH Fuse: Select the appropriate NH fuse based on the electrical specifications of your circuit. Ensure that the fuse rating matches the load requirements to prevent overheating and potential damage.
- Fuse Holder: Choose a fuse holder that is compatible with the NH fuse you have selected. The fuse holder should be rated for the same voltage and current as the fuse to ensure proper operation.
- Insulated Screwdriver: An insulated screwdriver is essential for safely removing and installing the fuse in the holder. Make sure the screwdriver is in good condition and has a properly insulated handle to prevent electrical shock.
- Safety Gloves and Goggles: Wearing safety gloves and goggles is crucial to protect yourself from potential electrical hazards and flying debris during the installation process.
- Voltage Tester: A voltage tester is used to verify that the circuit is de-energized before working on it. This helps prevent accidental electrical shock and ensures your safety.
Step-by-Step Installation Process
Now that you have gathered the necessary tools and materials, let's walk through the step-by-step process of installing an NH fuse in a fuse holder:
Step 1: Turn Off the Power
Before you begin any electrical work, it's crucial to turn off the power to the circuit at the main electrical panel. This helps prevent electrical shock and ensures your safety during the installation process. Use a voltage tester to verify that the circuit is de-energized before proceeding.
Step 2: Locate the Fuse Holder
Once the power is turned off, locate the fuse holder in your electrical system. The fuse holder is typically located near the electrical panel or in a distribution board. It is usually a small, rectangular box with a clear cover that allows you to see the fuse inside.
Step 3: Remove the Old Fuse
Using an insulated screwdriver, carefully remove the screws or clips holding the cover of the fuse holder in place. Once the cover is removed, you should be able to see the old fuse. Gently pull the old fuse out of the holder, taking care not to touch the metal contacts.
Step 4: Inspect the Fuse Holder
Before installing the new fuse, inspect the fuse holder for any signs of damage or wear. Look for loose connections, burnt marks, or other signs of overheating. If you notice any damage, replace the fuse holder before proceeding with the installation.
Step 5: Install the New Fuse
Take the new NH fuse and align it with the slots in the fuse holder. Make sure the fuse is properly seated and that the metal contacts are making good contact with the terminals in the holder. Gently push the fuse into place until it clicks or snaps into position.
Step 6: Replace the Cover
Once the new fuse is installed, replace the cover of the fuse holder and secure it with the screws or clips. Make sure the cover is tightly sealed to prevent dust and moisture from entering the holder.
Step 7: Turn On the Power
After the new fuse is installed and the cover is replaced, turn on the power to the circuit at the main electrical panel. Use a voltage tester to verify that the circuit is energized and that the new fuse is working properly.
Safety Precautions
Installing an NH fuse in a fuse holder involves working with electricity, which can be dangerous if not done properly. To ensure your safety, follow these safety precautions:
- Turn Off the Power: Always turn off the power to the circuit at the main electrical panel before working on it. This helps prevent electrical shock and ensures your safety.
- Use Insulated Tools: Use insulated tools, such as an insulated screwdriver, to prevent electrical shock. Make sure the tools are in good condition and have a properly insulated handle.
- Wear Safety Gear: Wear safety gloves and goggles to protect yourself from potential electrical hazards and flying debris during the installation process.
- Follow Manufacturer's Instructions: Always follow the manufacturer's instructions when installing an NH fuse in a fuse holder. This helps ensure that the installation is done correctly and that the fuse operates safely.
- Do Not Overload the Circuit: Make sure the fuse rating matches the load requirements of the circuit. Overloading the circuit can cause the fuse to blow and can also damage the electrical equipment.
Troubleshooting Tips
If you encounter any problems during the installation process or if the new fuse blows shortly after installation, try the following troubleshooting tips:
- Check the Fuse Rating: Make sure the fuse rating matches the load requirements of the circuit. If the fuse rating is too low, it may blow frequently. If the fuse rating is too high, it may not provide adequate protection.
- Inspect the Circuit: Check the circuit for any signs of damage or short circuits. Look for loose connections, frayed wires, or other signs of overheating. If you notice any damage, repair or replace the damaged components before installing a new fuse.
- Check the Fuse Holder: Inspect the fuse holder for any signs of damage or wear. Look for loose connections, burnt marks, or other signs of overheating. If you notice any damage, replace the fuse holder before installing a new fuse.
- Contact a Professional: If you are unable to troubleshoot the problem on your own, contact a qualified electrician for assistance. A professional electrician can diagnose the problem and provide a solution to ensure the safe and proper operation of your electrical system.
Conclusion
Installing an NH fuse in a fuse holder is a relatively simple process that can be done by anyone with basic electrical knowledge and skills. By following the step-by-step instructions outlined in this blog post and taking the necessary safety precautions, you can ensure the safe and proper installation of an NH fuse in your electrical system.
If you have any questions or need further assistance with installing an NH fuse in a fuse holder, please do not hesitate to contact us. As a leading NH fuse supplier, we have the expertise and experience to help you find the right fuse for your application and provide you with the support you need to ensure its proper installation and operation. We look forward to working with you and helping you meet your electrical protection needs.

References
- Electrical Safety Foundation International. (n.d.). Electrical Safety Tips. Retrieved from https://www.electricalsafetyfoundation.org/safety-tips/
- National Fire Protection Association. (2020). National Electrical Code (NEC). Retrieved from https://www.nfpa.org/codes-and-standards/all-codes-and-standards/list-of-codes-and-standards/detail?code=70
- Underwriters Laboratories. (n.d.). UL Standards for Safety. Retrieved from https://ulstandards.ul.com/